


A pinching waistband or constricting thigh band can instantly ruin the comfort of your favorite workout bottoms or casual summer wear. When activewear digs into the skin or creates uncomfortable pressure around the hips, understanding how to loosen shorts makes a noticeable difference in daily wearability. Many athletic shorts, biker cuts, and structured garments arrive with rigid waistbands designed for high compression, but excessive tension often leads to waistband rolling, chafing, and restricted breathing.
Finding the right balance between a secure hold and flexible ease requires gentle fabric manipulation tailored to specific textile blends. Exploring flattering workout bottoms often highlights how panel construction, elastane percentages, and stitch types influence overall flexibility. By applying controlled stretching techniques instead of harsh pulling, you can relax stubborn fibers, relieve abdominal pressure, and restore all-day mobility without compromising the garment silhouette.

Top Products


Step-by-Step Methods to Loosen Tight Shorts Safely
A tight pair of shorts can restrict your movement, cause painful waist marks, and turn routine workouts into uncomfortable chores. Successfully resolving this issue begins with identifying the exact textile structure, since synthetic athletic knits respond differently than woven cotton or rigid denim. Gentle moisture, steady mechanical tension, and targeted seam adjustment offer reliable ways to expand waistbands and leg openings without destroying structural seams. Following a systematic procedure ensures your apparel gains the needed flexibility while preserving the original cut and silhouette.
Identifying Fabric Composition Before Applying Tension
Every fabric responds to mechanical expansion according to its underlying fiber blend and weave construction. Rigid denim and woven cotton shorts feature plant fibers that soften and elongate readily when subjected to moisture and mild warmth. Synthetic activewear shorts, by contrast, utilize knitted filament yarns like nylon, polyester, and elastane that are engineered for strong snap-back recovery. Attempting to stretch synthetic activewear using techniques meant for heavy denim can easily overstress fragile elastane strands and cause permanent bagginess or fiber snaps.
Examining the inner care tag reveals the exact ratio of natural fibers to synthetic elastic components. Shorts with high spandex or elastane content, typically above ten percent, require gradual relaxation methods to avoid surface warping and sheer spots. Low-stretch garments composed primarily of cotton or polyester blends allow for firmer manual traction during the stretching routine. Knowing these precise ratios allows you to select the appropriate moisture level and stretching duration for your specific garment.
Woven textiles feature interlaced horizontal and vertical threads that provide structural stability but minimal natural give. Knitted activewear textiles feature interlocking loops of yarn that stretch naturally in multiple directions under normal movement. Applying excessive force to a woven waistband can snap structural sewing threads along the side seams. Knitted biker shorts tolerate broader directional tension, provided the individual stretch seams remain intact throughout the adjustment process.
The Warm Water and Conditioner Soak Technique for Synthetic Shorts
Synthetic activewear knits often benefit from a mild hair conditioner soak to help relax tightly wound polymer fibers. Fill a clean basin with lukewarm water and stir in a small amount of standard liquid hair conditioner until fully dissolved. Submerge the athletic shorts completely, gently pressing the fabric so the solution penetrates deep into the waistband and leg hems. Allow the garment to soak for fifteen to thirty minutes so the conditioning agents coat and lubricate the synthetic yarns.
Remove the shorts from the basin without roughly wringing or twisting the fragile stretch panels. Gently squeeze out the excess moisture between clean, dry bath towels using even downward pressure. Lay the damp shorts on a flat surface and begin gently massaging the tight waistband outward with your hands. Work your way around the entire circumference in small increments to ensure the fabric expands evenly across both the front and rear panels.
Rinse the garment thoroughly in cool water to wash away any remaining residue that could attract lint or alter fabric handfeel. Place the expanded shorts flat on a fresh towel away from direct sunlight or hot air vents to dry naturally. Avoid hanging the wet garment by thin clips, which can create distorted puckers and permanently deform the waistband edge. Allowing the fibers to settle at room temperature helps lock in the newly gained circumference without losing fabric density.
Mechanical Waistband Stretching for High-Rise and Scrunch Shorts
Mechanical stretching provides a steady, controlled tension that gently coaxes stubborn waistband elastic into expanding over several hours. A sturdy wooden clothes hanger or the padded back of a chair serves as an effective expansion frame for damp or dry shorts. Dampen the waistband with a fine mist of lukewarm water to make the synthetic threads more pliable before positioning. Slide the waistband over the frame, ensuring the tension is distributed evenly across the front, sides, and back.
High-waisted workout shorts often incorporate multi-layered compression panels that require careful alignment during mechanical expansion. Selecting high-rise athletic apparel options with balanced core support often shows how supportive waistbands rely on reinforced internal bands to stay upright. Make sure the waistband rests completely flat against the stretching form without twisting, folding, or curling at the top seam. Distorting the upper edge during drying can lead to uncomfortable rolling when you wear the garment later.
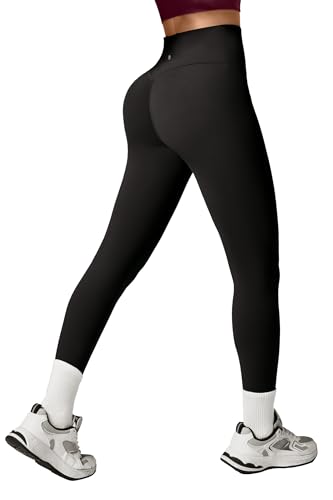
Pay close attention to rear ruching or contour stitching while applying mechanical tension to butt-lifting shorts. The gathered elastic seam running down the back requires delicate handling so the decorative thread loops do not tear under strain. Position the stretching frame so the outward force acts purely across the waistband circumference rather than pulling directly against the vertical ruched line. Leaving the garment on the frame overnight allows the relaxed fibers to set without compromising the rear shape.
Loosening Rigid Denim and Heavy Cotton Shorts Safely
Denim cutoffs and structured cotton shorts respond exceptionally well to moisture combined with body heat and movement. Fill a spray bottle with warm water and mist the waistband, hip sections, and upper thigh areas until the cotton feels damp to the touch. Pull on the damp shorts carefully and fasten the front closure securely to anchor the fabric in place. The natural cellulose fibers in cotton soften rapidly in the presence of water, making them receptive to gentle physical stretching.
Engage in active physical movements like deep bodyweight squats, lunges, and gentle hip rotations while wearing the damp garment. Walking around the house for twenty to thirty minutes allows the fabric to stretch precisely where your body needs extra room. Focus on bending at the waist and sitting on a firm chair to expand the waistband circumference along your lower abdomen. Once the fabric adapts to your shape, remove the shorts and lay them flat to air-dry completely.
A handheld garment steamer or standard household iron can also assist in relaxing stiff woven cotton waistbands. Hang the shorts securely and direct warm steam evenly along the interior and exterior of the waistband channel. While the fabric remains warm and moist from the steam, pull firmly along the top edge using both hands in opposite directions. The heat and steam temporarily unlock the fiber bonds, allowing a safe expansion of a half inch to an inch without breaking thread fibers.
Addressing Tight Leg Bands and Thigh Inseams on Biker Shorts

Tight leg bands on biker shorts frequently dig into the quadriceps and create uncomfortable bulging or friction during workouts. This localized restriction usually stems from an overlocked hem seam that lacks sufficient horizontal elasticity compared to the main body fabric. To ease the thigh openings, slide a large cylindrical object like a foam roller or wide water bottle into each leg hole. Mist the lower hem with lukewarm water and let the garment rest on the cylindrical shape for several hours.
Manual stretching along the hemline offers another practical way to expand tight leg openings quickly before heading out. Insert both hands into the leg opening, forming fists on opposite sides of the hem, and press outward firmly in a smooth, continuous motion. Rotate your hands around the entire circumference of the thigh band, holding each stretch for ten to fifteen seconds. Listen closely for any faint popping sounds, which signal that structural threads are under too much tension and need gentler handling.
Some biker shorts feature a narrow strip of internal silicone grip tape or clear elastic tape along the inner hem. These grip materials prevent riding up during cycling or running, but they severely limit the natural give of the lower leg opening. Rolling the hem slightly outward or warming the silicone tape with a warm washcloth can reduce excessive friction against the skin. If the hem remains intolerably tight, small strategic vertical snips to the non-structural hem edge can relieve pinching without unraveling the primary seams.
Releasing Enclosed Waistband Elastic Bands Safely
Many athletic and casual lounge shorts feature a hidden elastic band threaded through an enclosed fabric tunnel at the waist. When this internal elastic is cut too short during manufacturing, the waistband exerts harsh pressure regardless of main fabric stretch. Inspect the interior waistband seam to locate the casing channel and determine whether the elastic floats freely or is sewn directly into the seam. If the elastic moves freely inside the fabric tunnel, making a tiny vertical slit in the inner lining provides access.
Using small embroidery scissors, carefully snip halfway across the width of the inner elastic band without cutting into the outer shell fabric. This partial cut reduces the contraction tension of the elastic ribbon while keeping it anchored inside the channel. For buyers evaluating supportive waist garments, understanding how internal elastic tension affects abdominal comfort helps prevent buying overly restrictive sizes. After making the minor incision, test the fit to see if the tension has dropped to a comfortable level.
If the elastic band is stitched directly into the top and bottom hems of the waistband, avoid cutting across the seam blindly. Instead, use a basic seam ripper to release a few stitches along the inner casing edge where the band attaches. Gently work the elastic loose by hand to distribute the tension more evenly across the entire waist opening. Securing the opened seam with a few simple hand stitches afterward prevents the fabric casing from fraying during machine washing.
Preserving Fabric Opacity and Butt-Lifting Contour Seams
Overstretching athletic shorts poses a distinct risk to fabric opacity, especially across the glute panels and rear hips. Synthetic leggings and shorts achieve their squat-proof density through tightly knit microfibers that block light transmission under normal tension. When you stretch these materials excessively to gain extra room, the knit loops pull apart and allow light to pass through the thinned gaps. Always stretch the garment conservatively in minor increments, checking the rear panels against a bright light source between adjustment sessions.
Butt-lifting shorts rely on specialized ruching threads and curved contour panels to highlight natural body shapes without adding bulk. The delicate scrunch seam down the center back utilizes gathered elastic stitching that can snap under uncontrolled lateral pulling. When expanding the waist or upper thighs, support the central ruched seam with one hand to prevent direct tension from traveling across the gathered stitches. Protecting these decorative seams ensures your shorts maintain their flattering rear profile and structural integrity.
Contour shadow panels knit into activewear shorts often feature distinct yarn densities to create subtle visual depth. Pulling too aggressively on these shaded zones can warp the knit pattern, resulting in wavy, uneven lines across the hips. Apply stretching force strictly along the top waistband seam and lower leg hems where the fabric structure is reinforced. Keeping tension centered on structural boundaries preserves the visual alignment and compression balance designed into the athletic garment.
Avoiding Common Garment Stretching Mistakes
Subjecting synthetic activewear to extreme heat is one of the most frequent mistakes made when attempting to loosen tight shorts. Boiling water, high-heat dryer cycles, and direct hot irons melt or degrade fine elastane filaments, permanently destroying elasticity. Once elastane fibers break from excessive heat, they lose all rebound capability and leave the fabric wavy, limp, and permanently misshapen. Stick exclusively to lukewarm water, gentle ambient air drying, and low-temperature steam when relaxing athletic materials.
Another common pitfall involves pulling violently on one localized section of the waistband instead of working around the full perimeter. Concentrating all stretching force in a single area stretches out front or side seams unevenly, causing twisted hems and lopsided rises. Take time to distribute manual tension systematically, measuring progress against your body to maintain a balanced, symmetrical fit. Gentle, repeated stretching across multiple sessions yields far better results than one aggressive pull that risks ripping construction stitches.
Using improper stretching objects with sharp corners can puncture activewear fabrics and create irreversible snagging or tears. Avoid using rough wire hangers, squared chair corners, or bulky furniture edges that exert point pressure on delicate synthetic yarns. Smooth, rounded frames like circular foam rollers, tailored wooden hangers, and padded chair backs provide safe, continuous expansion without catching fabric loops. Protecting the textile surface during stretching keeps your shorts looking smooth and fresh through seasons of wear.
Verification and Proper Post-Stretch Garment Care
Once you finish loosening your shorts, verify the new fit by wearing the garment through a standard range of daily motions. Walk around your home, sit down on a chair for several minutes, and perform a few deep bends to assess waistband behavior. A properly loosened waistband should sit securely against your midsection without pinching, rolling downward, or leaving deep red pressure marks. If the thigh bands still feel restrictive during forward movement, repeat a brief targeted moisture stretch along the lower hem.
Maintaining your newly expanded fit requires thoughtful laundry habits to prevent fibers from contracting back to their tight state. Wash stretched shorts in cold water on a gentle cycle using mild detergent, avoiding harsh fabric softeners that degrade synthetic elastic strands. Skip the heated clothes dryer entirely, as high tumble temperatures cause natural and synthetic fibers alike to shrink back rapidly. Lay the shorts flat or drape them smoothly over a drying rack to preserve the relaxed circumference over time.
Recognizing the physical limitations of your garment helps you set realistic expectations regarding permanent versus temporary fit expansion. Natural fibers like cotton denim stay stretched longer between washes, while high-spandex athletic knits slowly recover some tension after being laundered. Applying mild manual stretching after washing while the garment is damp easily restores your preferred fit before each wear. Taking a patient, gentle approach ensures your activewear and casual shorts remain comfortable, flattering, and durable for everyday use.




Write Your Review
No reviews yet. Be the first to share your experience!